
Moving your domain name from one provider to another can feel like a huge task, but it’s actually quite straightforward if you know the steps. The key is to transfer the domain name methodically: first, you get everything ready at your current registrar, then you start the transfer with your new one, and finally, you double-check all your settings once the move is complete. A little bit of prep work goes a long way in making sure your website and emails don’t skip a beat.
Your Essential Guide to a Smooth Domain Transfer
So, why would you even move your domain? For many Australian businesses, especially those using WordPress, it’s a strategic move. You might be chasing better hosting performance, looking for a support team that actually replies, or just want to bring all your web services under one roof to save a bit of money.
Whatever your reason, the process can seem intimidating. It’s full of technical terms and the ever-present fear that you’ll accidentally take your own website offline. This guide will walk you through the whole thing, from start to finish.
At its core, a domain transfer really boils down to three main phases.
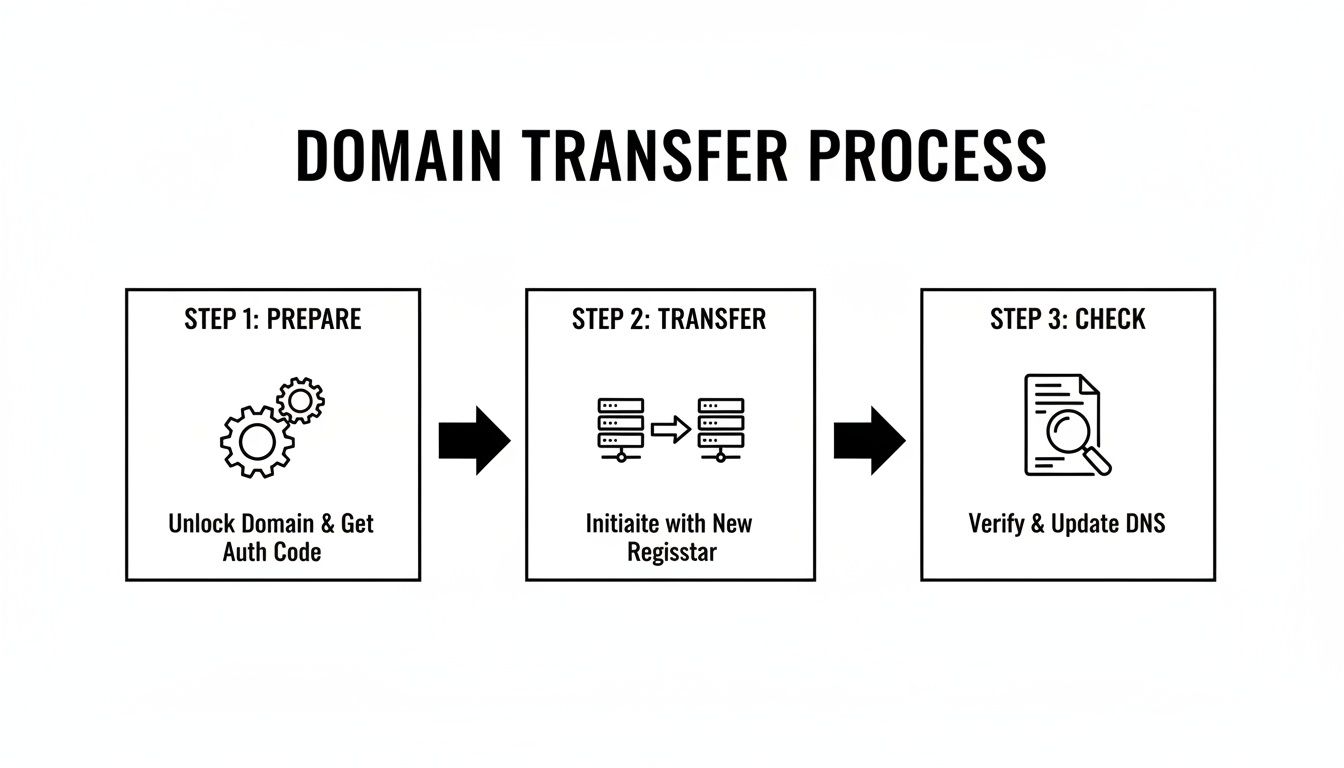
Think of it like moving house: you pack your boxes carefully (preparation), the movers take them to the new place (transfer), and then you unpack and make sure everything is where it should be (final checks).
Why a Planned Transfer Matters
Rushing a domain transfer without a plan can cause some serious headaches. Forget to update your contact details in the WHOIS database, and you might miss the all-important email to approve the transfer, leaving it stuck in limbo. Or, if you don't copy your DNS settings correctly to the new registrar, your email could go down for days.
I’ve handled countless transfers for businesses across Australia, and the one thing that guarantees a zero-downtime move is preparation. A simple checklist is honestly your most valuable tool here.
My goal is to give you the confidence to manage this move yourself. I’ll throw in some specific tips for Australian businesses, including how to handle .au domains and best practices for keeping your WordPress site happy. By following this process, you can avoid the common traps and ensure your digital address moves seamlessly, keeping your business online and uninterrupted.
Preparing Your Domain for a Seamless Move
Thinking of moving your domain name? The key to a smooth, headache-free transfer is all in the prep work. Before you even think about starting the process, there are a few crucial checks to run at your current registrar. Getting this groundwork right is the difference between a quick, seamless switch and a frustrating ordeal that could knock your website offline.
Believe me, simple oversights are the biggest cause of failed transfers. Data from auDA, the body governing Australian domains, revealed that in one recent year, a staggering 22% of attempted .au transfers fell over simply because of things like expired authorisation codes or locked domains. These aren't complex technical problems; they're basic administrative mistakes that can lead to days of downtime. You can explore more on why these details matter by reading up on domain statistics and facts.
Let’s get your domain ready for the move.
Check Your WHOIS Contact Information is Current
First things first, let's talk about your WHOIS details. Specifically, the administrative email address tied to your domain. This isn't just a bit of trivia stored in a database; it’s the official line of communication for anything related to your domain’s ownership.
When you kick off the transfer, your new registrar has to send an approval email to this address to confirm you're the one making the request. If that email address is old, incorrect, or one you no longer have access to, you’ll never see the verification link. The transfer will simply time out, and you'll be left wondering what went wrong.
So, log in to your current registrar's control panel, navigate to your domain's contact settings, and make sure that admin email is correct and accessible. If it isn't, update it immediately.
Temporarily Disable Your Domain Privacy
Many registrars provide a domain privacy or WHOIS guard feature. It's a fantastic security tool for everyday use, as it hides your personal contact details from the public WHOIS registry, replacing them with generic information from your registrar.
During a transfer, however, this privacy shield becomes a roadblock. The gaining registrar needs to verify the actual owner's details, not a proxy service. Before you do anything else, you'll need to temporarily switch this feature off.
I've seen countless transfers get stuck on this one simple step. Think of it as being asked for ID at the bank—they need to see your face, not a stand-in. Disabling privacy is the digital version of that.
You can, and absolutely should, switch it back on as soon as your domain is safely settled at its new home.
Unlock Your Domain
By default, registrars apply a transfer lock to your domain as a security measure. It's designed to stop someone from trying to hijack your domain and transfer it away without your permission. It’s a good thing to have, but you need to remove it before you can move.
This is almost always a straightforward toggle switch in your domain management area, usually labelled "Domain Lock" or "Transfer Lock". Setting this to "Unlocked" is your way of telling the global registry system that you’ve approved the domain for a move.
Forgetting this step is an instant failure. The request will be automatically rejected, forcing you to go back and start all over again. If you're still weighing up your options for a new provider, our guide on choosing the best domain name registrar in Australia is a great place to start.
Lower Your DNS Time-to-Live (TTL) Values
One of the biggest worries with a domain transfer is potential downtime. Here’s a pro-tip that can dramatically reduce that risk: adjust your Time-to-Live (TTL) settings. TTL essentially tells servers around the world how long to "remember" your domain's DNS information before they check for an update.
A typical TTL might be set to 24 or 48 hours. If you transfer your domain and update your nameservers, it could take that long for the change to propagate everywhere. To avoid this lag, you can lower the TTL for crucial records well in advance.
At least 24 hours before starting the transfer, change the TTL to a much shorter period, like 300 seconds (5 minutes). This forces servers to check for new DNS information more frequently, ensuring a much faster and cleaner switch when you point your domain to its new home after the transfer.
To make things easier, here’s a quick checklist to run through before you start the transfer process.
Domain Transfer Preparation Checklist
This table summarises the essential actions you need to take at your current registrar to ensure a smooth transfer.
| Action Item | Why It's Important | Where to Do It |
|---|---|---|
| Verify WHOIS Admin Email | This is where the crucial transfer approval email will be sent. An incorrect address will stall the entire process. | Your current registrar's domain contact information or WHOIS management section. |
| Disable Domain Privacy | The new registrar needs to see your real contact details to verify you as the legitimate owner. | Look for "Domain Privacy," "WHOIS Guard," or a similar setting in your domain management panel. |
| Unlock the Domain | A locked domain cannot be transferred. Unlocking it signals your approval for the move. | Find the "Domain Lock" or "Transfer Lock" toggle in your domain's security settings. |
| Lower DNS TTL | Reduces the time it takes for DNS changes to propagate, minimising potential downtime after the transfer is complete. | In the advanced DNS settings or zone file editor at your current registrar. |
Completing these four steps is your best defence against the common pitfalls of domain transfers. It puts you in full control and paves the way for a quick and successful move.
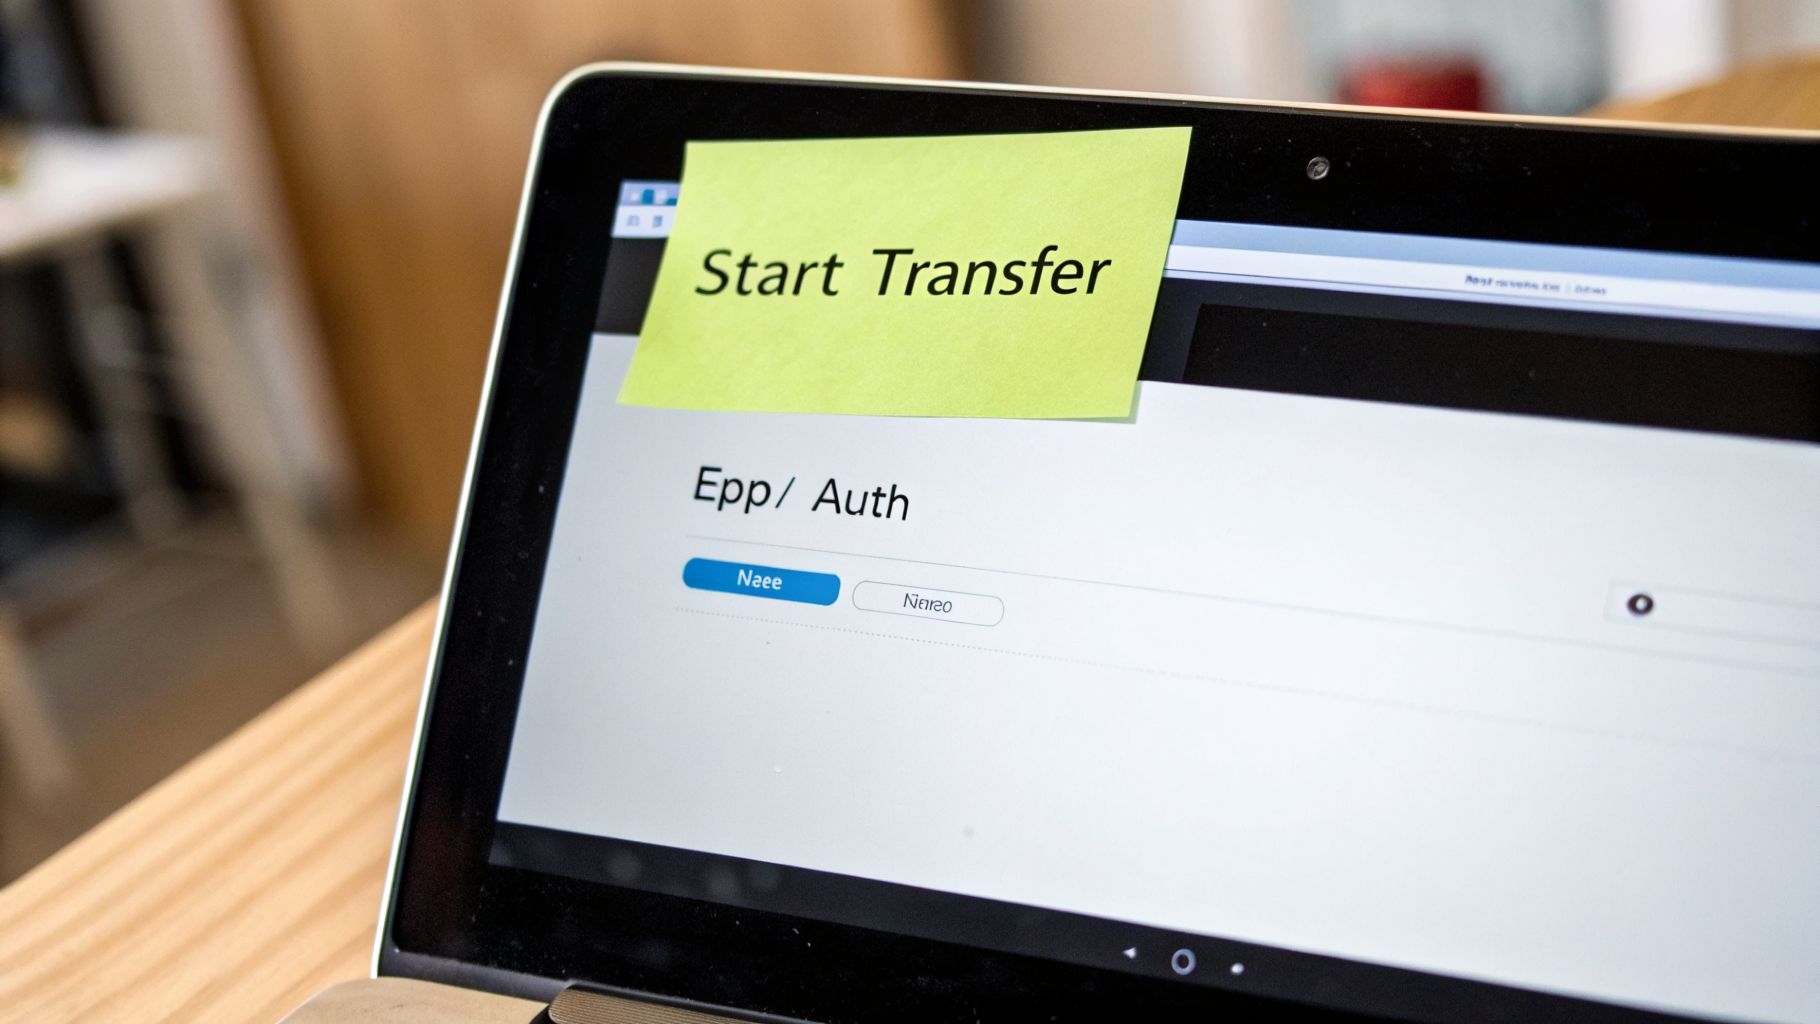
Alright, you've done the prep work. Now for the main event: kicking off the actual domain transfer.
This is the part where you officially authorise the move from your old provider to your new one. It sounds technical, but honestly, it’s mostly about passing a special code from one company to the other.
The whole thing rides on getting one critical piece of information. Let’s get that sorted first.

Getting Your Authorisation Code
Think of the authorisation code as the key to your domain's front door. It’s a unique string of characters that proves you’re the rightful owner with permission to move it. You might see it called a few different things, so don't get thrown off if your provider uses another term.
- EPP Code (this stands for Extensible Provisioning Protocol)
- Auth Code or AuthInfo Code
- Transfer Key
This code is generated by your current registrar, and you’ll need to log in to their dashboard to find it. I usually find it tucked away in the domain management or security section, often right next to the "Domain Lock" setting you’ve already disabled.
Some registrars will display it on the screen, while others will email it to the domain’s admin contact. Just be patient—it can sometimes take a few minutes to show up.
Once you have this code, guard it carefully. It’s the single most important piece of the puzzle, giving anyone who has it the power to initiate a transfer. Keep it private until you’re ready to use it.
Kicking Off the Transfer at Your New Home
Now, head over to the new registrar you've chosen. Look for their "Transfer Domain" or "Transfer a Domain" page—it's almost always a prominent option on their site or in your account dashboard.
From here, the process is usually dead simple:
- Enter your domain name you want to move.
- Provide the authorisation code you just got from your old provider. I always recommend copy-pasting this to avoid typos.
- Confirm and pay. You'll almost certainly be asked to pay for a one-year renewal. This is standard procedure. The good news is this year is added onto your existing expiry date, so you don't lose any time you’ve already paid for.
Once that's done, your new registrar fires off a formal transfer request into the global domain registry system. This is the official starting pistol for the final verification stage.
Approving the Final Confirmation Email
This is the last security checkpoint, and it’s a big one. Shortly after initiating the transfer, an email will be sent to the administrative email address on your domain's WHOIS record. This is exactly why we made sure that email was correct during the prep phase!
This email contains a crucial link you must click to approve the transfer. It’s the final "yes, this is really me" confirmation. If you don't click it, the transfer will eventually time out and fail. If you don't see it within an hour, be sure to check your spam folder.
Even if you’re moving away from a provider like GoDaddy, it can be helpful to understand how their systems work, especially if you have other services with them. Our guide on how to set up a DNS server with GoDaddy can offer some useful background context.
A Quick Note on Australian Domains
If you’re moving a .au domain (like a .com.au or .net.au), the process governed by the Australian domain authority (auDA) is a bit different—and much, much faster.
You still need an authorisation code, which is often called the "Registry Key" for .au domains, but the timeline is way quicker.
- Lightning-Fast Approval: Forget the typical 5-7 day wait for generic domains. A
.autransfer can be done and dusted in under 48 hours. - Proactive is Better: As soon as you click the approval link in that confirmation email, the transfer happens very quickly.
- Automatic Completion: If you don't do anything, the transfer will automatically complete after two days anyway.
This is a fantastic advantage for Australian businesses. By approving the transfer right away, you can slash the uncertainty and have your domain settled into its new home within a day or two, all ready for the final checks.
Post-Transfer Checks to Keep Your Site Live
Getting that "transfer complete" email is a great feeling, but the job isn't quite done. Think of it like moving house—the removalists have left, but you still need to unpack the boxes and get the power turned on. This final phase is all about making sure your website and email actually work at their new home.
Far too many people skip these last checks and then wonder why their website is suddenly offline. Taking a few careful steps right now is what separates a smooth transfer from a frustrating one.
Let's get everything plugged in and working as it should.
Update Your Domain Nameservers
This is your first and most critical job. Your domain is now with its new registrar, but it's still pointing to your old hosting provider's servers. You need to give it the new address.
Nameservers are essentially your domain's master address book. When someone types in your web address, their browser asks your nameservers where to go. Right now, they're still giving out the old address.
To fix this, you'll need to update them to point to your new hosting provider. Your host will have given you at least two nameserver addresses, which usually look something like this:
ns1.newhost.com.auns2.newhost.com.au
Just log in to your new registrar's dashboard, find the nameserver management area for your domain, and swap the old addresses for the new ones.
This single change is what brings your website online with your new host. It can take anywhere from a few minutes to 48 hours to update across the globe, a process called DNS propagation. If you lowered your TTL values like we suggested earlier, this will happen much faster.
Replicate Your Crucial DNS Records
With your nameservers updated, you're now managing all your domain's settings from your new provider. If you have a simple website, you might be done. But most businesses have other services tied to their domain—and these settings don't come across automatically.
I’m talking about things like your email, any subdomains you use, or third-party verification tools. You need to manually recreate these records at your new registrar. This is a classic "gotcha" that causes emails to mysteriously stop arriving.
Here’s a quick checklist of the records you'll want to find and copy over:
- A Records: These point your main domain (
yourdomain.com.au) and subdomains (likeblog.yourdomain.com.au) to a specific server. - CNAME Records: These are aliases that point one name to another. For example,
www.yourdomain.com.auis often a CNAME that points toyourdomain.com.au. - MX Records: Mail Exchanger records are absolutely vital. They tell the internet where to send your email, whether it's to a Google Workspace or Microsoft 365 server. Get this wrong, and you won't get any new emails.
A great pro-tip is to take a screenshot of your old DNS settings before you start the transfer domain name process. This gives you a perfect blueprint to copy, ensuring you don't miss a thing.
Specific Checks for WordPress Users
If your website is built on WordPress, there are a couple of extra checks that can save you a world of pain. Moving hosts can sometimes trip up a few things inside the WordPress environment itself.
First, reset your permalinks. This is the structure of your URLs. Go to your WordPress dashboard, navigate to Settings > Permalinks, and simply click "Save Changes" without altering anything. This tiny action re-writes the rules and often fixes a heap of "404 Not Found" errors on your internal pages.
Next, you may need to run a search-and-replace on your database. If your domain name changed or you moved from a temporary URL, old internal links and image paths could still be pointing to the wrong place. A plugin like "Better Search Replace" is perfect for safely updating these.
Finally, double-check your SSL certificate. While most modern hosts issue a new one automatically, you should always verify it's active. A valid SSL is crucial for security, SEO, and building trust with your customers. If you need a refresher, our guide on how to properly install an SSL certificate is a great resource.
Getting these post-transfer steps right ensures your digital presence stays online and uninterrupted. While the process is usually reliable, it pays to be careful. Industry reports show 15-20% of domain moves hit delays, often due to simple authorisation problems. As this domain trends report shows, a bit of careful planning goes a long way.
Troubleshooting Common Domain Transfer Issues

Look, no matter how many times you do this, a domain transfer can sometimes throw you a curveball. The good news is that nearly every problem I’ve seen is a common one with a straightforward fix.
If you find your transfer has stalled or your site’s gone dark, don't panic. Let's walk through the usual suspects when you transfer a domain name and how to get everything running smoothly again.
The Transfer Was Rejected or Failed
Getting that "transfer failed" notification is frustrating, I know. But it almost always points back to a simple oversight during the prep work. The rejection notice itself is your first clue, so read it carefully.
Here are the most common culprits I see for a rejected transfer:
- The Domain is Still Locked: This is the number one reason for an instant rejection. A domain lock is a security feature, so you have to turn it off. Log in to your old registrar and make sure you’ve set the status to "Unlocked" before you try again.
- The Authorisation Code is Incorrect: An EPP or auth code is basically a password for the transfer. If it's wrong, the system will deny the request. I always tell people to regenerate a new code and copy-paste it directly, rather than typing it out. It’s too easy to mix up characters like 'O' and '0' or 'l' and '1'.
- The 60-Day Transfer Lock is Active: This is an ICANN rule, not a registrar policy. It prevents a domain from being transferred within 60 days of its initial registration or a previous transfer. If your domain is brand new, you'll simply have to wait it out.
The Authorisation Email Never Arrived
You’ve started the transfer, but the crucial approval email is nowhere to be found. This is almost always a simple email delivery issue, not a problem with the transfer process itself.
First, give it an hour. Automated systems can sometimes have a short delay.
If it's still missing, dive into your spam or junk folder. These emails often get flagged by aggressive spam filters.
The most common reason for a missing approval email is an outdated admin contact in your WHOIS records. If the email listed is an old one you can't access, you'll never see the notification. You have to log back into your old registrar, update the admin email, and then restart the transfer process.
Your Website is Down After the Transfer
This is the scenario everyone dreads. It's important to realise the transfer itself doesn't cause downtime. Your site goes offline because the domain no longer knows where your hosting is located. This is a DNS problem, and it's entirely fixable.
The cause is almost always incorrect nameserver settings. After the transfer completes, your domain is probably still pointing to your old host's nameservers. You need to log in to your new registrar and update them to point to your hosting provider.
Your host will give you at least two nameserver addresses (like ns1.newprovider.com.au and ns2.newprovider.com.au). Once you update these, it can take a few hours for the changes to spread across the internet—this is called propagation. If you lowered your TTL values beforehand, this part will be much faster.
Your Email Has Stopped Working
This is another classic post-transfer headache and a perfect example of why you need to replicate your DNS records beforehand. Your email service, whether it's through Google Workspace, Microsoft 365, or your host, depends on specific records called MX (Mail Exchanger) records.
When you switched your nameservers, you effectively wiped the DNS slate clean. Your old MX records vanished, so the internet no longer knows where to deliver your email.
To fix this, you need to:
- Log in to the DNS management panel at your new registrar.
- Find the MX records provided by your email service (Google, for instance, has a specific list of records and priorities).
- Add these MX records exactly as required.
Once the records are saved, your email will start flowing again as the DNS changes propagate. This is why I always recommend taking a screenshot of your old DNS settings—it’s an invaluable safety net that prevents this exact problem.
Your Domain Transfer Questions Answered
Even with a clear plan, moving your domain can feel a bit daunting. It’s completely normal to worry about things like downtime, how long it all takes, and what it might mean for your website's hard-earned search rankings.
We get these questions all the time from Australian business owners. So, let's tackle the big "what ifs" and give you the straightforward answers you need to transfer your domain name with confidence.
How Long Does a Domain Name Transfer Take?
This really comes down to the type of domain you're moving. For generic domains like .com or .net, the process is guided by global ICANN rules, which means it usually completes automatically within five to seven days.
But if you're transferring an Australian domain, you’re in for a much faster ride. The process for .au domains is a lot quicker, which is great news.
For a
.com.auor.net.audomain, if you proactively click the approval link in the confirmation email, the entire transfer can be finalised in under 48 hours. This is a huge advantage for local businesses wanting to minimise the transfer window.
If you don't click the link, don't worry—the transfer will still happen automatically after a couple of days. The takeaway here is that being proactive can shave days off the process.
Will My Website Go Down During the Transfer?
This is the number one fear for most website owners, and for good reason! The answer, thankfully, is no—as long as the transfer is handled correctly, your website should have zero downtime.
It’s important to remember that your domain registration and your website hosting are two completely separate things. The transfer process is only about moving the management of your domain name to a new registrar. Your actual website files and hosting account aren't touched.
The secret to a seamless switch is all in the DNS management.
- Before the transfer: As we covered earlier, lowering your domain's TTL (Time To Live) is a smart move that helps your new settings get picked up faster across the internet.
- After the transfer: The only thing left to do is log in to your new registrar and update your domain's nameservers to point to your hosting provider.
Even during the short period while these DNS changes spread (propagate), your site stays live. Visitors will simply be served from either the old or new location until the update is complete everywhere. They won't notice a thing.
Does Transferring a Domain Affect SEO?
Purely transferring your domain registrar has no direct negative impact on your SEO. Search engines like Google connect your website's reputation and rankings to the domain name itself, not the company you register it with.
However, indirect issues can creep in if the transfer is fumbled. For instance, any significant downtime or forgetting to copy over important DNS records (like your MX records for email) could stop Google from crawling your site, which could then affect your rankings.
As long as you follow the steps for a smooth, zero-downtime transfer, your SEO is perfectly safe. In fact, if you’re moving to a better, faster hosting provider at the same time, the potential performance boost could actually give your SEO a little lift.
Can I Transfer an Expired Domain Name?
The short answer is no, you generally can't transfer a domain that has already expired. Once a domain passes its expiry date, it typically enters a "Redemption Grace Period." During this time, it's locked by the current registrar to prevent it from being snatched or moved without your permission.
To get it moving, you first have to renew the domain with your current registrar. Once it's active again, you can then go through the normal steps: unlock it, get the authorisation code, and start the transfer. Always double-check your domain's expiry date before you begin.
Managing your WordPress website's health is just as important as managing its domain. If you need expert help with updates, security, or performance, Webby Website Optimisation offers specialised WordPress support to keep your site running perfectly. Find out how we can help you with our WordPress Help and Support services.
If this post raised some questions feel free to ask me a question