
Think of a GoDaddy SSL certificate as the digital equivalent of a sturdy lock on your shop's front door. If your WordPress website handles any kind of user information—from a simple contact form to complex credit card transactions—then an SSL isn't just a nice-to-have. It's a fundamental part of protecting your customers, your data, and your business's reputation.
Why a GoDaddy SSL Is a Must-Have for Your WordPress Site

Let's get straight to it. Your website is your online storefront, and an SSL certificate is what secures the flow of information within it. Without one, any data—names, emails, payment details—is sent as plain text, making it an easy target for anyone snooping around. An SSL is your first and best line of defence. To really get a handle on why this matters, it helps to understand what an SSL certificate is and the encryption it provides.
It All Comes Down to Trust
For any Australian business, especially those in e-commerce or local services, trust is everything. When a visitor lands on your site and sees the little padlock icon and "https" in their browser bar, it’s an instant, visual confirmation that you take their security seriously. That tiny symbol can be the deciding factor in whether someone completes a purchase, submits an enquiry, or simply clicks away.
A GoDaddy SSL certificate does more than just encrypt data; it validates your business's commitment to security, turning a technical requirement into a powerful trust signal that fosters customer loyalty and confidence.
This is especially true in Australia's thriving e-commerce space. GoDaddy SSL Certificates hold a significant 12.39% market share among businesses using credit card processing technologies here. This shows just how many small and medium-sized enterprises (SMEs) rely on GoDaddy to secure their online transactions and build that crucial customer confidence.
The Double-Win of Security and SEO
Beyond building trust, adding a GoDaddy SSL certificate to your WordPress site comes with some powerful business perks. Search engines like Google actively favour secure websites. This means having an SSL can give you a real, measurable boost in your search engine rankings. On the flip side, browsers will flag an unsecured site with a warning, which can scare off as many as 85% of potential visitors.
Ultimately, securing your site is a foundational step that pays dividends in several key areas:
- Protects Sensitive Data: It encrypts the connection between a user's browser and your server, shielding information from attackers.
- Enhances Your Reputation: A secure site shows you're a professional outfit that cares about customer safety.
- Improves SEO Performance: Google’s preference for secure sites helps you get a leg up on unsecured competitors.
Seeing the "why" behind it all reframes this task. It’s not just a technical chore; it's a strategic investment in your business's security, reputation, and long-term growth.
Navigating the Purchase and Initial SSL Setup

Getting started with an SSL certificate can feel like the most daunting part, but I promise it's more of a box-ticking exercise than a complex technical challenge. It all begins inside your GoDaddy account, where you'll find their range of SSL certificates. For most WordPress sites, particularly if you're just starting out, the standard Domain Validation (DV) SSL is absolutely the way to go. It’s quick, affordable, and gives you all the essential encryption you need.
After you've bought your GoDaddy SSL certificate, you'll see it pop up in your "My Products" list. Don't be alarmed if its status says "Pending"—that just means it's waiting for you to kick off the setup. This brings us to our first real technical task: generating a Certificate Signing Request, or CSR.
Generating Your Certificate Signing Request
A CSR is basically an application form for your SSL certificate. It's a chunk of encrypted text that contains key details about your server and domain name. You'll generate this on your web server, not within GoDaddy itself. How you do this depends on your hosting, but for the vast majority of people using WordPress on a shared hosting plan, this means heading into cPanel.
Find the "SSL/TLS" manager in your hosting cPanel. Think of it as your security hub. Inside, you're looking for an option called "Certificate Signing Requests (CSR)". Clicking this takes you to a form that needs specific information about your website and your organisation.
Don’t let the fields on the CSR form intimidate you. For a standard DV certificate, the main thing is to be accurate. Make sure the "Common Name" is your exact domain name (like yourdomain.com.au), and fill everything else out correctly. This is the one step you really want to get right to make sure the certificate is issued for the correct site.
When you fill out the CSR form, you'll be asked for a few details:
- Common Name (CN): This is the most crucial field. It must be the exact domain you want to secure, like
www.yourwebsite.com.auor simplyyourwebsite.com.au. - Organisation: Your registered business name.
- Organisation Unit: "Web" or "IT" is usually fine here.
- City/Locality: The city where your business is based.
- State/Province: Write out the full state name, not the abbreviation.
- Country: Choose your country from the list.
Once you submit the form, cPanel will spit out two blocks of text: the CSR and a Private Key. You need to copy the entire CSR, from -----BEGIN CERTIFICATE REQUEST----- all the way to -----END CERTIFICATE REQUEST-----. You'll paste this directly into the setup page for your new SSL certificate GoDaddy product.
As for the Private Key, save it somewhere safe on your computer. You’re going to need it later when you install the certificate. If you're trying to secure multiple domains or subdomains with just one certificate, you might want to look into more advanced options; our guide on SAN SSL certificates can help you there.
Alright, you've submitted your CSR to GoDaddy. The next hurdle is proving you actually own the domain you want to secure. This is called domain validation, and honestly, it's where a lot of people hit a snag. Just think of it as a quick ID check before the Certificate Authority (CA) gives you the keys to the kingdom.
GoDaddy has a few simple ways to get this done. There’s no single "best" option here; it really just boils down to what’s easiest for you to access. The goal is to pick the path of least resistance.
Choosing Your Validation Method
You’ll be presented with a few choices for your GoDaddy SSL certificate validation, and each has its moment to shine depending on your setup.
Here are the main options you'll see:
- Email Validation: This is usually the fastest route. The CA will fire off a verification email to a standard admin address for your domain, like
admin@yourdomain.com.auorwebmaster@yourdomain.com.au. If you have access to one of those inboxes, you can get this sorted in minutes. - HTML File Upload: For this one, GoDaddy gives you a small HTML file to upload into a specific folder on your web server. You can typically do this using your hosting control panel's File Manager or an FTP client. It's a fantastic backup plan if you don't have access to the required email addresses.
- DNS Record: This method involves adding a specific TXT record to your domain's DNS settings. It’s just as effective as the others, but be warned—it can sometimes take longer for the changes to spread across the internet. If you're not comfortable poking around in your DNS records, you might want to stick with one of the other two methods. If you'd like to learn more about this, you might find our guide on how to update your DNS server settings at GoDaddy helpful.
My advice? Start with the email option. If that's a no-go, the HTML file upload is an excellent and reliable fallback.
Once you pick a method and follow the instructions—like clicking the link in the email or uploading the file—the validation is usually automatic. You can expect it to complete within 5-10 minutes, after which GoDaddy will issue the certificate.
Downloading Your Certificate Files
Once GoDaddy has validated your domain, you'll get an email letting you know your certificate has been issued. Now it's time to grab the files you'll need for the installation.
Jump back into your GoDaddy account, head over to "My Products," and find your SSL certificate. You should see its status has changed to "Issued." From there, you'll see an option to download your files. When it asks you to choose a server type, just select the one that matches your hosting environment. If you’re on a standard cPanel host, "Apache" is almost always the right choice.
GoDaddy packages everything up for you in a .zip file. When you open it, you’ll see a few files, but you really only need two for the installation:
- The Certificate (CRT file): This is your main SSL certificate. It's usually named with a long string of random characters or your domain name, and it will have a
.crtextension. - The Certificate Bundle (CA Bundle): This file contains the intermediate certificates that chain your SSL back to a trusted root authority. Look for a file named something like
gd_bundle.crt.
Keep these two files somewhere safe, along with the Private Key you saved when you generated the CSR. With these three pieces—your CRT, the CA Bundle, and your Private Key—you've got everything you need to install the SSL certificate GoDaddy has issued for your website.
Alright, with your certificate files ready to go, it's time for the final piece of the puzzle: getting that GoDaddy SSL certificate installed on your server. You should have three key files: the certificate (CRT), the CA Bundle, and your Private Key. Getting these organised beforehand is the secret to a smooth installation.
While the exact clicks can differ depending on your hosting setup, the general idea is always the same. We'll walk through the process for the three most common hosting environments you'll find with WordPress sites: cPanel, GoDaddy's own Managed WordPress, and a self-managed Virtual Private Server (VPS).
Installing Your Certificate in cPanel
So many Australian businesses run on hosting that uses cPanel, and for good reason—it makes tasks like this quite straightforward. Once you're logged into your cPanel dashboard, find the "SSL/TLS" manager, which is probably the same spot where you generated your CSR earlier.
From there, you'll want to click on "Install and Manage SSL for your site (HTTPS)". On the next screen, pick your domain from the dropdown list. You’ll see three boxes appear, waiting for your certificate files.
- Certificate (CRT): Open the
.crtfile you downloaded from GoDaddy using a plain text editor (like Notepad on Windows or TextEdit on Mac). Copy absolutely everything inside and paste it into the first box. - Private Key (KEY): If you generated the CSR on this server, cPanel is usually smart enough to find and fill in the private key automatically. If the box remains empty, just paste in the key you saved earlier.
- Certificate Authority Bundle (CABUNDLE): Finally, open your
gd_bundle.crtfile, copy all the text, and paste it into the last box.
Hit the "Install Certificate" button, and that's it! The server will do a quick check to make sure the files match up and then apply the SSL to your domain.
Activating SSL on GoDaddy Managed WordPress
If you're on GoDaddy's own Managed WordPress Hosting, things get even easier. Because the certificate and hosting are from the same ecosystem, the installation is often a simple, one-click affair.
In most cases, after you buy and set up the SSL certificate GoDaddy links to your hosting account, it will either install automatically or show up as a ready-to-go option in your hosting dashboard. You just need to find your site settings and flick the SSL switch to "on". GoDaddy handles all the technical bits in the background.
This streamlined process is a big reason why GoDaddy's Domain Validation (DV) certificates are so popular with WordPress users. In Australia, small and medium-sized enterprises (SMEs) represent a massive 99.8% of all businesses, and affordable security is a top priority. With SMEs being the fastest-growing SSL segment at 15% year-over-year, approachable solutions like GoDaddy's are vital. You can discover more about enterprise end-user trends in this eye-opening report.
Installing an SSL on a VPS
For those with a bit more technical confidence running a Virtual Private Server (VPS), the installation is a more hands-on process, but it also gives you complete control. You'll need to connect to your server, usually with SSH, and upload your certificate files to a specific directory. If you're a bit rusty on that, our article on how to upload a file over FTP is a great refresher.
Pro Tip: On a VPS, the real work happens in your web server's configuration file. You'll need to edit this file (like Apache's
httpd.confor an Nginx.conffile) and add directives that point to the exact location of your new certificate, key, and bundle files. Once you save those changes, a quick restart of your web server will make the SSL certificate live.
Alright, you’ve wrestled with the server and your GoDaddy SSL certificate is installed. That’s a huge win, but don’t close your tabs just yet. Think of it this way: you’ve installed a high-tech security system, but now you have to actually arm it and make sure everyone uses the right door. Your WordPress site still needs a clear directive to use this new, secure HTTPS connection for everything.
These last few tweaks inside your WordPress dashboard are what separate a "mostly secure" site from a properly configured one. The first stop is your site's core settings.
Jump into your WordPress admin and go to Settings > General. You'll spot two fields that are absolutely vital right now: WordPress Address (URL) and Site Address (URL). All you need to do here is change the prefix from http:// to https:// for both of them. Hit "Save Changes," and you've officially told WordPress its new, secure identity.
This simple change is the foundation, but it won’t magically update every single link you've ever added to your site.
Dealing With Pesky Mixed Content Errors
After updating those URLs, you might refresh your site and notice the browser isn't showing that reassuring padlock icon. Don't panic. This is almost always caused by "mixed content." It simply means the page itself is loading securely over HTTPS, but some of its assets—like images, fonts, or scripts—are still being called from their old, insecure HTTP locations. Browsers flag this as a potential vulnerability.
Now, you could try to hunt down every single one of these old URLs by hand, but on any site with more than a few pages, that's a one-way ticket to a massive headache. From years of doing this, I can tell you the fastest and most reliable fix is a good search-and-replace plugin.
My go-to tool for this job is the Better Search Replace plugin. It’s a beautifully simple tool that does one thing and does it perfectly. Once you’ve installed and activated it, the process is straightforward:
- Head over to
Tools > Better Search Replace. - In the "Search for" box, type in your old HTTP address (e.g.,
http://yourwebsite.com.au). - In the "Replace with" box, put your new HTTPS address (e.g.,
https://yourwebsite.com.au). - Select all the tables in your database to ensure you don’t miss anything.
- Pro tip: Always check the "Run as dry run?" box first. This shows you what it will change without actually doing it. Once you're happy with the preview, uncheck the box and run it for real.
This single action will comb through your entire database and update all those internal links in one fell swoop, solving most mixed content warnings instantly.
Forcing a full HTTPS connection isn't just a technicality for getting a green padlock. Research shows that visitors are 84% more likely to abandon a purchase if they realise a site is sending data over an insecure connection. Fixing mixed content is about protecting user trust and your bottom line.
The diagram below shows how the different installation paths all lead to this final configuration stage within WordPress.
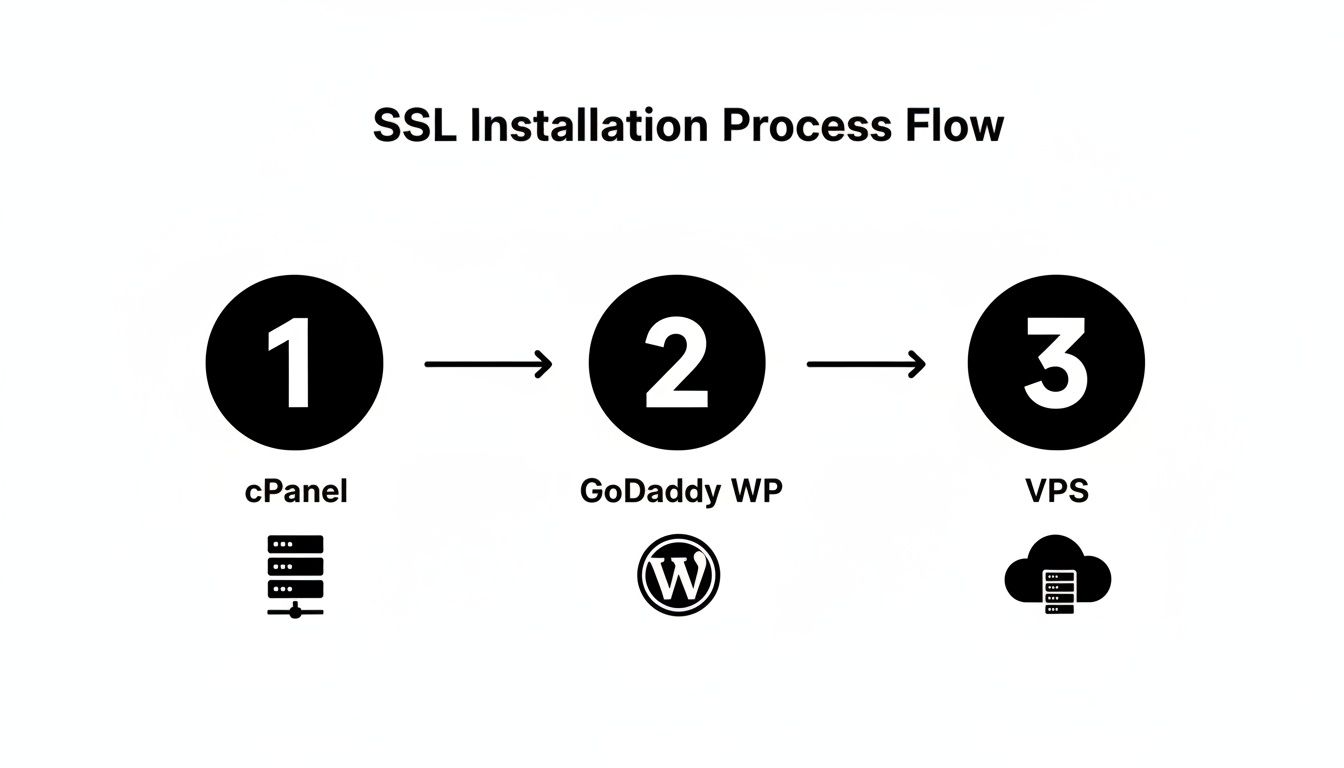
Whether you’re on a standard cPanel host, GoDaddy’s own Managed WordPress platform, or a custom VPS, the journey always ends with these critical adjustments inside your WordPress site itself.
Cementing the Change with Permanent Redirects
The last piece of the puzzle is making sure everyone—both human visitors and search engine bots—always lands on the secure version of your site. To do this, you need to set up a site-wide 301 redirect. This is a permanent instruction that automatically sends any traffic trying to access an http:// page to its corresponding https:// version.
This is non-negotiable for your SEO. A 301 redirect tells search engines that the move to HTTPS is permanent, which allows them to pass all the hard-earned ranking power and link authority over to your new secure URLs. If you skip this, you risk splitting your SEO value between two different versions of your site, which can seriously harm your visibility in search results.
How you implement this redirect can depend on your hosting server's configuration, but thankfully, many popular SSL or security plugins for WordPress provide a simple, one-click toggle to get this done.
Troubleshooting Common GoDaddy SSL Installation Issues
Even with the clearest instructions, a GoDaddy SSL certificate installation can hit a bump in the road. It happens. After years spent fixing these exact problems, I can tell you that most issues boil down to a handful of common culprits. Let’s walk through them so you can get your site secured without pulling your hair out.
One of the most common roadblocks is the NET::ERR_CERT_COMMON_NAME_INVALID error. This scary-looking warning almost always points to a simple mismatch. It means the domain name on your SSL certificate doesn't line up with the web address a visitor is actually using. For example, you might have secured yourdomain.com.au, but a visitor lands on www.yourdomain.com.au.
The fix is usually straightforward. You either need to reissue the certificate to cover both the www and non-www versions of your domain, or simply set up a redirect that forces all traffic to the one correct, secured version.
The Missing Padlock Mystery
So, what if the installation seems to have gone off without a hitch, but that reassuring padlock icon is nowhere to be seen? This is a classic symptom of "mixed content," a problem we touched on earlier.
It means that while your main page is loading securely over HTTPS, it's still pulling in some elements—like images, scripts, or fonts—from old, insecure http:// links. Modern browsers see this as a security flaw and will refuse to display the full padlock. The quickest way to sort this out is with a database search-and-replace tool. For WordPress sites, a plugin like Better Search Replace can update all those old URLs to the new https:// version in one go.
Proactive security is more than just installing an SSL. For WordPress users, specialists like Webby pair GoDaddy's reliable certificates with daily malware scans and encrypted backups. This comprehensive approach is vital, as the Australian Cyber Security Centre reported over 1,000 data breaches in 2023, many targeting websites with security gaps. You can learn more about how GoDaddy SSLs are used across Australia's secure transaction landscape in this market analysis.
When Validation or Installation Fails
Sometimes, the trouble starts much earlier in the process. If you’re stuck in a loop with failed domain validation, take a deep breath and double-check the method you chose.
- Email Validation: Is the verification email hiding in your spam folder? Also, make sure the
admin@yourdomain.com.auemail address is actually active and receiving mail. - File Upload: Be meticulous here. You must upload the HTML file to the exact directory GoDaddy specified. A single typo in the folder or file name will cause it to fail.
- DNS Record: DNS changes aren’t always instant. If you’ve waited over an hour, it's time to carefully review your domain’s DNS settings for any typos in the record you added.
If the certificate looks like it's installed correctly in cPanel but just isn't active on your live site, it almost always comes down to a copy-and-paste error. You might have pasted the certificate into the bundle field, used an outdated Private Key, or your server may just need a quick restart to recognise the new certificate. Honestly, just re-checking your copy-paste work solves this more often than not.
A Few Common Questions About GoDaddy SSLs
Even with a step-by-step guide, it's natural to have a few questions rattling around. Getting your GoDaddy SSL certificate up and running is one thing, but understanding the little details gives you real peace of mind.
Here are the answers to some of the most frequent queries I hear from people after they've gone through the process.
How Long Does The SSL Installation Process Take?
Honestly, this can vary. I’ve seen the whole thing done and dusted in 30 minutes, but I’ve also seen it stretch into a couple of hours.
Getting the certificate purchased and validated with GoDaddy is usually the fastest part—often under 15 minutes. The real variable is your WordPress site itself. If you run into a bunch of "mixed content" errors that need to be manually fixed, that’s where you’ll spend most of your time.
Do I Need a Dedicated IP for My GoDaddy SSL?
Nope, not anymore. This is a classic piece of outdated advice you might still see floating around on old forum posts. Years ago, you did need a dedicated IP address to install an SSL, but technology has moved on.
Today, virtually all modern web servers use a technology called Server Name Indication (SNI). It’s a clever bit of tech that allows multiple SSL certificates to live happily on a single, shared IP address. This is now the industry standard, so you don’t need to worry about the extra cost or hassle of a dedicated IP.
The widespread adoption of SNI has been a game-changer for web security. It makes strong encryption affordable and accessible for everyone, meaning a small business on a shared hosting plan can be just as secure as a major enterprise.
What Happens When My GoDaddy SSL Certificate Expires?
This is a big one, and you definitely want to avoid it. The moment your GoDaddy SSL certificate expires, visitors to your site will be hit with a jarring security warning, like "Your connection is not private".
That error screen is a trust killer. It frightens visitors away and can seriously damage your brand's reputation overnight.
To prevent this nightmare scenario, pay close attention to the renewal emails GoDaddy sends. Better yet, enable the auto-renewal feature. It’s the simplest way to ensure your site stays protected without you having to lift a finger. Just make sure your billing info is always current.
At Webby Website Optimisation, we manage the entire SSL lifecycle for our clients, from the initial setup to ongoing renewals. We make sure your WordPress site is always fast, secure, and trustworthy. If you need a hand, our Perth-based team is ready to provide expert WordPress help and support.
If this post raised some questions feel free to ask me a question
Trackbacks/Pingbacks